Digital Camera Imaging
Jack Kramer
Digital cameras are becoming more popular these days as a replacement for film cameras. And guess what...they're basically a type of CCD camera. Does that give you any ideas?
This past Christmas, my wife and I decided to get a digital camera. It began more as her idea to have a convenient way to view and distribute family photos, but having seen some surprisingly good astronomical images taken with ordinary digital cameras, I realized that this might also be put to use in my favorite hobby. We chose one of the highest resolution models - a 3.3 megapixel Sony Cyber Shot, which has a maximum image size of 2048x1536 pixels. Lower resolution cameras should also work for astrophotography, but the scale of the image would be smaller.The Cyber Shot is a "top-of-the-line" camera, but as is normal in the techno-gadget world, it will soon be made obsolete by others on the market with still better features.
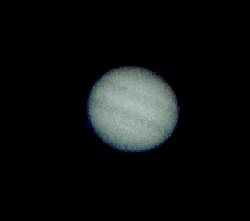
Amazingly, you can hold the camera up to the eyepiece of your telescope, click the shutter, and end up with an image that actually looks like something other than a blur. A few days after we got the camera, I did this on Jupiter using my 4-inch refractor. Holding it steady by hand is the big problem, and I ended up with a few poor to mediocre images, along with the best one shown here. It's nothing outstanding, but try doing this with a hand-held film camera, using just the automatic settings!
There actually are ways to control the imaging process beyond just the point-and-shoot method that I used on the above shot of Jupiter. This particular camera allows adjustment of the f ratio from f/2 to f/8, and the shutter speed from 1/1000 second to 8 seconds. (A speed of 1/30 second was used for the above image.) The problem is that these two settings are not independent; for example, if you set the f ratio at f/2, the shutter speed automatically resets to 1/30 second. Things like sharpness, white balance, and exposure are also adjustable. But despite the detailed manual, some things are never explained. For example, it says you can set the exposure value from +2.0 EV to -2.0 EV, but nowhere are you told what this does to the finished shot. Also, the greater sensitivity of the electronic format means that you can't always apply your experience gained in film photography. Jupiter was a bright, washed-out blob with any exposure longer than 1 second. I discovered that the only way to decipher some of the cryptic instructions was to take lots of images, trying all the settings. The best way to start is to set everything on "automatic" and go from there. I would guess that the various brands of digital cameras each have their own unique differences, though none of them have anywhere near the number of optional settings as would a good film format 35mm SLR. But one of the neat things about a digital camera is that after you take a picture, you can immediately look at it on your computer monitor, then return outside for another shot, trying a different setting if necessary.
The first step toward consistently better results was making some sort of mount to avoid having to hand-hold the camera and to keep the camera lens as close as possible to the telescope eyepiece. The easiest solution was to use a PVC pipe fitting of about the right diameter to mate the camera with an eyepiece. My Orion MegaVista 10.5mm eyepiece has a long barrel with enough width to securely carry the camera. All that was required was some smaller pieces of PVC tubing to act as shims, plus a little interior surface grinding. If the tubes fit snugly enough over the lenses, then it's not necessary to include setscrews to hold everything in place. Several different PVC tubes can be added to shim this homemade camera adapter to fit other sizes of eyepieces or to fit over the focuser drawtube for prime focus imaging. (Digital camera adapters for use with telescopes are also available commercially.)
With the camera securely mounted to the eyepiece, it becomes possible to use the self-timer feature to avoid vibration caused when you press the shutter release button. With the self-timer activated, the shutter trips 10 seconds after pressing the shutter release. This is more than enough time for vibrations to settle out of a good telescope mounting.
The following image of Schröter's Valley on the moon was taken through the GP-C102 refractor at 160x using the camera mounted to the eyepiece.

The same setup produced this image of Saturn, which clearly shows the Cassini Division, as well as the shadow of the planet on the left side of the ring system.

When it comes to deep sky objects, digital cameras are of limited use because of their inability to take images of sufficient duration to capture faint details. For this you need a real CCD setup. With the exposure set to the maximum 8 seconds, stars show up fairly well, but bright stars are over-exposed. With an 8-second image of M42 in Orion taken in the 4-inch, software can be used to enhance the image to make the nebulosity just barely visible; however, the Trapezium stars become bloated blobs. Of course, a telescope with greater light grasp would give better results on the faint stuff.
As with any type of photography, you can't make a silk purse out of a sow's ear. If the image in your telescope isn't very good, you won't get a good image in the camera. The best time to shoot is on a night when the seeing is very steady and you have nice crisp images in the scope. If the image in your telescope appears to be going in and out of focus due to atmospheric turbulence, you'll be very lucky if the camera catches the one moment of good seeing. Other factors also come into play. I discovered that on one night the planet images all had a yellowish cast, due either to light pollution or to glare from the full moon.
The only improvement you can make is the image processing available in whatever software you have. (Invariably, digital cameras all come with some basic software.) Most imaging programs have the ability to sharpen an image and adjust the color balance. In some cases, converting the image to black-and-white can improve the contrast by getting rid of extraneous color. One program I've had for many years (Paint Shop Pro) has unsharp masking capability, which is a technique long used in astrophotography. Another method is to combine or "stack" images - sharpen and intensify them by overlaying two or more images on top of each other; this feature is only available in more sophisticated software packages.
You may have noticed that the title of this article referred to this as "Phase I". That's because it's a work in progress...I'm still learning how to do it. So far I've only experimented with images through my 4-inch refractor, but will eventually use larger telescopes as weather conditions permit. A larger scope means a brighter image, though it also must provide a high-contrast, well-detailed image for the camera. I was so amazed at how easy it is to get a decent image that I wanted to share the initial results and encourage you to try imaging through your telescope if you have a digital camera or are thinking of getting one. Because of its applicability for normal photography purposes, one of the widely available digital cameras is a fairly painless way to try some through-the-telescope shots without committing big bucks for imaging equipment. But if you become really serious about astro-imaging, this could lead to a CCD camera intended for that very purpose...
Published in the February 2001 issue of the NightTimes


