Howie Glatter Laser Collimator
John Smith
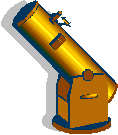
This article reviews the function and quality of the Howie Glatter laser collimator; however, it does not go into collimation basics. This laser collimator can be used to collimate Newtonians, Refractors, and Cassegrain scopes, yet it is most commonly used for Newtonians. More information can be found at: http://www.collimator.com/coltext.htm#order.
 Before using a laser for collimation on a Newtonian telescope, the focuser, spider, and secondary mirror holder have to be lined up correctly. One thing to consider when purchasing a laser collimator for a Newtonian is the length of the focuser drawtube. My scope uses a low profile drawtube. Because of this, the body of the laser collimator protrudes out the back end enabling the user to see the return beam. This beam enters the aperture of the laser to line up the optical components. A longer focuser tube would require a purchase of an attachment. Howie Glatter calls his attachment the Blug, (barlowed collimation plug). The plug is inserted into the inner end of the focuser drawtube; it has a barlow in the center and a 45 degree face. The laser is inserted into the eyepiece end; it shines through the optical system, and returns the shadow of the primary mirror donut onto the face of the collimation plug. You would collimate by adjusting the primary screws until the donut is centered over the hole in the plug. I do not have any experience using this particular accessory, but more information can be found at: http://www.collimator.com/blug.htm or http://www.cloudynights.com/item.php?item_id=1480.
My first purchase of a Glatter laser was a 2"- 1 1/4 " single beam with a 650 nanometer wavelength. It was a single beam laser with a body type that accommodates 2" or 1 1/4" focusers. The laser body fits into a good quality focuser snug without play. The construction of the laser is of high quality machined aluminum that will withstand shocks. After five years of ownership, it has never lost collimation. It uses a 123A lithium cell camera battery which lasts a few years. The on-off switch is simply the battery cap that screws up or down to make contact with the battery and it works very well. I always make sure I screw the cap up a couple of turns after usage to be sure the laser is not left on.
A single beam laser is not as accurate as using a set of collimation tools. When Howie Glatter came out with a barlowed laser attachment, I found out the single beam laser was not threaded, except to the Barlow so I decided to sell the single beam laser. I purchased a 2"-1 1/4 " 635nm holographic laser with a barlow attachment. A barlow attachment can achieve as accurate an alignment as a typical alignment tools.
This laser collimator has all the bells and whistles. 635nm is a brighter laser than the 650nm but in my opinion the 650nm was bright enough, which I had with my first laser. The holographic attachment screws into the aperture end of the laser. It diffracts light from the laser to project a grid pattern that forms a box which is quite useful for centering optical elements. Another attachment is a plastic aperture stop having a 1mm hole that push-fits into the laser aperture. It produces a tiny circular beam impact which allows more accurate alignment of the secondary. This is the part I feel was the weakest link of the whole laser system. The plastic aperture stop would wear out from repeated installations and become loose and fall out. This plastic part seemed out of place with such a high quality tool. I had e-mailed Howie about this and apparently I wasn't the only one, as he replied that a new one was being developed. This was about a year ago and finally a new single beam aperture stop was made. It was worth the wait. This new aperture stop is aluminum and threaded to screw on. It also has a disc with a small hole in its center and a flat white front surface as a screen. The screen makes the return beam much easer to see.
An add-on accessory to the laser is the barlow attachment. This is similar to the newly designed aperture stop with the disc and white screen. A barlow is added to the center hole.
To collimate with this laser, I will first screw in the single beam aperture and line up the secondary to the center of the primary mirror. Next, remove the single beam aperture, install the barlow and line up the primary to the projected shadow of the primary mirror donut onto the center of the disc of the laser. This process takes about two minutes at most. My first impression with using the barlow is how much more accurate my collimation has become. Turning the mirror cell screws even 1/16" made a significant change in the centering the donut. Collimation with the Glatter laser is very accurate and easy (even fun).
I would highly recommend the barlowed Glatter laser collimator; just make sure you get the newly revised aperture stop with the laser.
Published in the June 2007 issue of the NightTimes


